The recent spate of blog migrations has caused me to take a closer look at my current platform-of-choice and how it’s hosted. Statamic 1.4.2 is a resource-intensive web application, and my original web host wasn’t up to the task. After some research the site landed on AppFog and I’ve been quite happy since. They bill themselves as “Public Cloud Platform as a Service (PaaS)”. From an average blogger’s perspective, that means they host your web app for you without a lot of fuss. AppFog has some significant limitations, but if those issues don’t bug you they offer one of the simplest site update workflows I’ve ever experienced.
So far AppFog has been an excellent host, but part of the reason is that I’m on a grandfathered free plan that includes custom domain support. Custom domains now cost $20 per month. I’ll be willing to pay that much when I have to, but it’s important to keep in mind that they’re about double the cost of a traditional web host. AppFog also has a limit on bandwidth, 5GB per month on the free plan and 10GB per month on the $20 plan.
There's one other important caveat to keep in mind: AppFog doesn't currently support persistent local storage. One of Statamic's great strengths is its user-friendly admin interface, but it won't work on AppFog since any changes to the app's online filesystem can get flushed at any time. I write all my posts locally, so it's not a big deal for me, but blogger beware.
If none of these issues scare you away, let’s look at how to create and update a site like mine.
Creating a New Application
AppFog’s Getting Started documentation is excellent. Create an account, pick an application environment (PHP) and a hosting platform (I chose Amazon Web Services US East). Finally pick a subdomain that’s easy to remember. If you’re on a paying plan, you can change to your custom domain later.
Your next step is to open a terminal and type:
gem install af
That will install AppFog’s custom command-line toolkit. If you’re on Windows and don’t have a Ruby environment, you should follow their instructions which aren’t that much more difficult.
Next change to the root directory of your Statamic site and login using:
af login
Enter your AppFog username and password, then invoke the af push command, which will walk you through the process of setting up your site. Here’s how it looked for me:
af push

Would you like to deploy from the current directory? [Yn]: y
Application Name: themindfulbit
Detected a PHP Application, is this correct? [Yn]: y
Application Deployed URL [themindfulbit.aws.af.cm]:
Memory reservation (128M, 256M, 512M, 1G, 2G) [128M]: 128M
How many instances? [1]: 1
Bind existing services to 'themindfulbit'? [yN]: n
Create services to bind to 'themindfulbit'? [yN]: n
Would you like to save this configuration? [yN]: y
Manifest written to manifest.yml.
Creating Application: OK
Uploading Application:
  Checking for available resources: OK
  Packing application: OK
  Uploading (1K): OK
Push Status: OK
Staging Application 'themindfulbit': OK
Starting Application 'themindfulbit': OK
Since Statamic doesn’t use a database, the setup is quick and simple.
Updating your Site
The next time you write a post or make a tweak to the local version of your site all you have to do is type:
af update themindfulbit
Obviously you’ll use your own application name instead of themindfulbit here. AppFog’s tool will upload your changes and restart your site for you.
Uploading Application:
  Checking for available resources: OK
  Processing resources: OK
  Packing application: OK
  Uploading (24K): OK
Push Status: OK
Stopping Application 'themindfulbit': OK
Staging Application 'themindfulbit': OK
Starting Application 'themindfulbit': OK
That’s about the simplest update workflow of any blog/host I’ve used, especially one that supports static posts in Markdown.
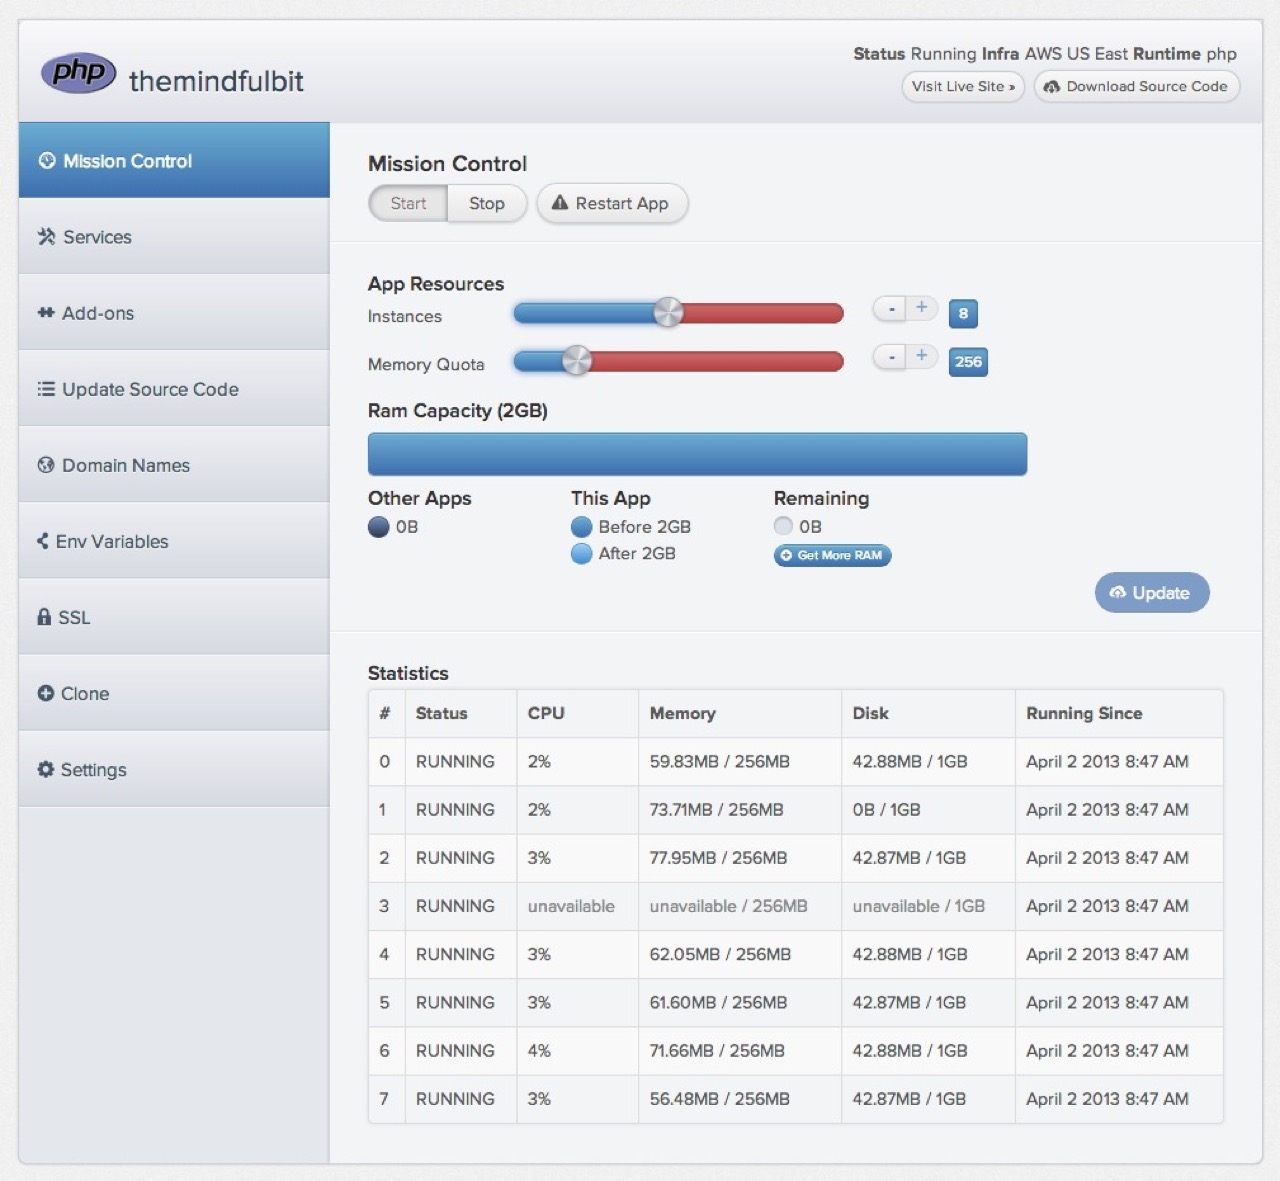
One of the advantages of using AppFog is that you can spawn multiple instances of your site to handle heavier loads. The free and $20 tier allow up to eight instances running under 2GB of total RAM. You can tweak your settings via their easy-to-use control panel.

AppFog Control Panel
I’ve got mine maxed out because hey, free RAM. You can create other apps (or sites) in that space if you’re so inclined, which may help you get more bang out of your $20.
I’m pretty happy with AppFog so far. Their simple control panel and no-fuss application hosting has been great. I’m not entirely happy with how they communicated the loss of custom domain support for their free plans, but it sounds like they had some pretty good reasons to do so. AppFog may not be for everyone (especially after they reshuffled their plans) but they helped me out in a pinch and I appreciate that.
