For about the last ten years my computers have been named after planets. The scheme roughly coincided with my switch away from Windows to Linux and Mac, and was made a whole lot more fun by a little program called Xplanet.
Xplanet is a command-line program for UNIX-like systems that renders an image of any solar system objects you like for a given date and time. It's been around a long time and (like many mature command-line utilities) has a near endless array of configuration options.
This walk-through will show you how to configure Xplanet to show a periodically refreshed image of Jupiter (as seen from its moon Io) on your OS X Mountain Lion desktop.
Jupiter is a great subject because it rotates once every ten hours and has beautiful clouds. Io is an interesting world in its own right, and helpfully circles Jupiter once every two days, keeping the day/night cycle moving at an always-evolving, ADD-friendly pace.
Prerequisites
The first thing you’ll probably need to install is Xcode or (more specifically) the Xcode command line tools. The easiest way to do this is install Xcode through the Mac App Store. Once Xcode is running, go to the Downloads pane of the Xcode preferences panel. Under components, you’ll find the command line tools. Click the Install button.

XCode Download Pane
Next, you’ll install the Homebrew package manager. Usually this is as simple as opening up a terminal window and typing or pasting:
ruby -e "$(curl -fsSL https://raw.github.com/mxcl/homebrew/go)"
Homebrew will walk you through its installation process, which should be fairly quick. To make sure it all installed OK, run the following once installation is done:
brew doctor
Next you’ll need XQuartz, a version of the X.Org X Window System for OS X. You can download the latest version from MacOSForge. Installation will require you to log out and log back in.
Once you’re done, installing Xplanet is as simple as:
brew install xplanet
Generating the images
There aren’t any good image maps of Jupiter or its moons included with the default Xplanet installation, so you’ll have to add your own. There are some good resources out there, but to make things easier I’ve wrapped images of Jupiter and its four Galilean moons (Io, Europa, Ganymede and Callisto) into a zip file you can download.
Open the zip and place the files in your xplanet images directory. Mine is located at:
/usr/local/Cellar/xplanet/1.3.0/share/xplanet/images
Next you’ll need a script to generate an image. Here’s an example shell script I’ll call jupiter.sh:
RESOLUTION='1440x900' # Resolution of the finished image. Should match your screen.

NOW=$(date "+%Y%j%H%M%S") # That's year, julian date, hours, minutes, seconds

BODY='io' # The celestial body targeted.
LONGITUDE='180' # Where over the target body you want to hover
RADIUS='3' # How big you want the target to look

rm /Users/username/Pictures/xplanet/* ; # Empty the directory

/usr/local/bin/xplanet -body $BODY -longitude $LONGITUDE -radius $RADIUS -center +450+350 -num_times 1 --geometry $RESOLUTION --output /Users/username/Pictures/xplanet/$NOW.jpg ;
Remember to substitute your username in place of username.
We’re going to store your new desktop pictures in ~/Pictures/xplanet so make that folder if you need to. Store jupiter.sh someplace convenient. I keep mine in ~/Dropbox/scripts. We’ll need to make it executable, so in the terminal type:
chmod a+x ~/Dropbox/scripts/jupiter.sh
So what does the script do? First it sets a number of variables that Xplanet needs to render the image. Then it clears out the folder if anything is in there, which is required for our desktop updates. Finally it renders the image and names it based on the current date and time.
You can run the script from the terminal.
cd ~/Dropbox/scripts
./jupiter.sh
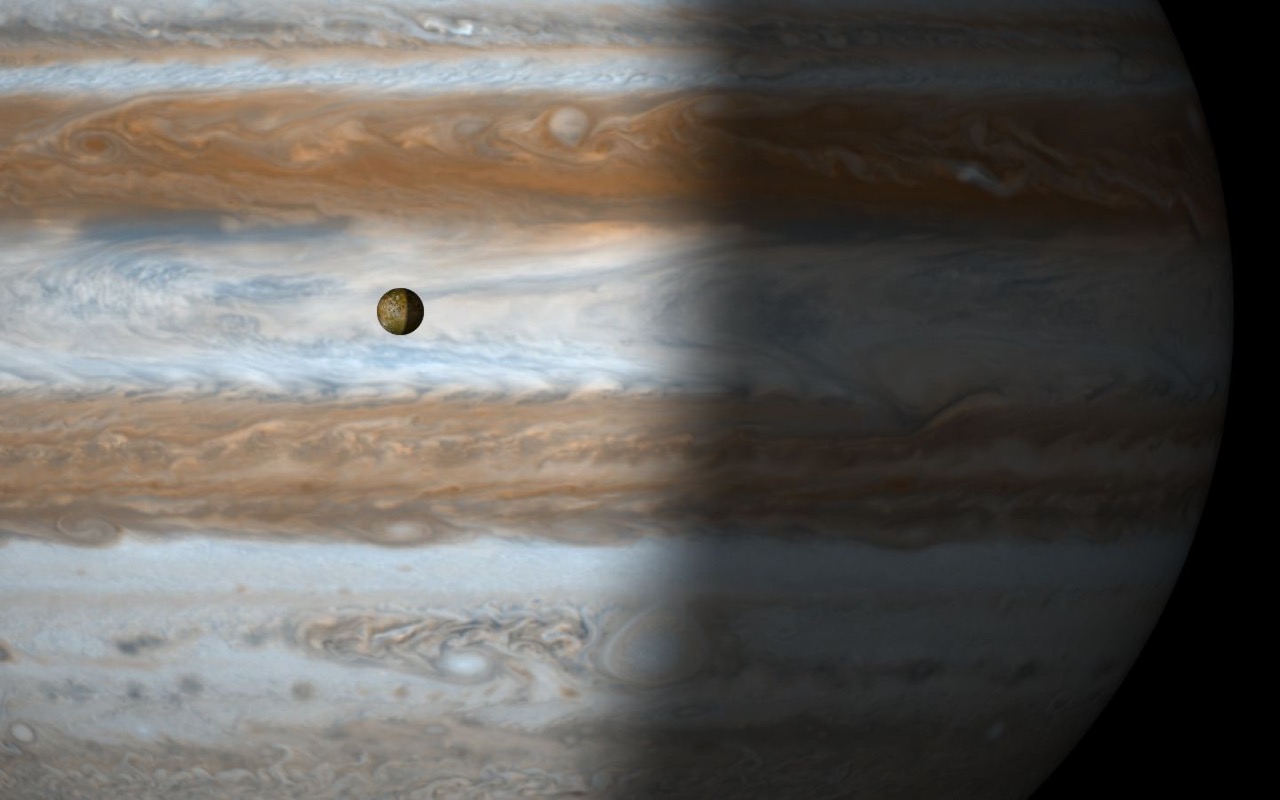
I ran it on my machine and got a file named 2013083121633.jpg. It looks like this:
Jupiter Desktop with Io
Cool, huh? That’s reminiscent of one of my favorite images from the Cassini mission.

Jupiter and Io from Cassini
A Slideshow of One
So how do we make this into an ever-changing wallpaper? The script is already doing the heavy lifting for you, all you need to do is turn things on. Enter the Desktop & Screen Saver settings pane, add the ~/Pictures/xplanet folder. Select your spiffy new Jupiter pic and check the box that causes it to change pictures. Mine are set to change every five minutes.

Desktop Settings
This is also the reason why the script has to delete all the files in your xplanet directory every time it runs. OS X won’t replace an image with itself or even with a new image with the same name (it used to, but that ended in Lion). By removing the existing image and replacing it with a completely new file, your desktop will update succesfully.
Now we’re going to tell the system to run your spiffy shell script at the same interval. Open a text editor and create a file named com.themindfulbit.xplanet.plist in ~/Library/LaunchAgents. You may have to make the LaunchAgents folder if it’s not already there.
In the .plist file, put the following code:
<?xml version="1.0" encoding="UTF-8"?>
<!DOCTYPE plist PUBLIC "-//Apple//DTD PLIST 1.0//EN" "http://www.apple.com/DTDs/PropertyList-1.0.dtd">
<plist version="1.0">
<dict>
    <key>Label</key>
    <string>com.themindfulbit.xplanet</string>
    <key>ProgramArguments</key>
    <array>
        <string>/Users/username/Dropbox/scripts/jupiter.sh</string>
    </array>
    <key>StartInterval</key>
    <integer>300</integer>
</dict>
</plist>
Log out, then log back in. The new Launch Agent you created will tell the system to run your script every 300 seconds.
If everything all works out, something’s going to happen on your desktop. Something wonderful.
More fun
Did I mention that I’ve set up similar views for Jupiter’s other Galilean moons Europa, Ganymede and Callisto on three other desktops? They look something like this: